This post will show you how much of an amateur do-it-yourself-er I really am. (Well, if you hadn’t already picked up on it from the previous post.) I had dreams of black shutters and a black door to compliment the cream siding at the new house. The faded forest green color made the house look incredibly dated. But more importantly, before we had been in the house a week we had heard from two neighbors that the previous owners were not very well liked in the neighborhood due to the lack of attention they paid to the house and yard. So, that put the pressure on us to avoid being THAT neighbor for these folks again. We determined to prioritize a few outdoors improvement plans. You know, so the neighbors would like us.
I started out by researching how to paint shutters, and I found some good info. The only problem was, what works for some people may not work for others. None of the articles/blogs I had read mentioned that some shutters aren’t paintable. (Yes, you can see what’s coming.)
Not having that insight at the start, I bought a nice black exterior paint and started painting early one morning after cleaning off a shutter, giving it a light sand, and wiping it clean. I knew there was a problem when the paint seemed like it was just falling off. I decided to finish painting it, let it dry, and see what happened. This was the result.

Now, I don’t know if you can tell from the picture, but the green is clearly showing through. In lieu of a faded forest green it was at least now an even green-black color. Because we had already spent the money on the paint we decided to stop and let the shutter dry to see how it looked the next day. We hoped that the painting would work so we didn’t have to buy all new shutters, an expense we hadn’t anticipated.
After coffee the next morning we bounced outside to the garage to survey the shutter and those smiles became frowns. The paint was sticky, almost like it had been applied just an hour ago. We let it dry two more days and it was still tacky to the touch. And still eerily green under the black overcoat. We worried that if we installed, the first rain would wash away the paint and potentially cause the paint to stain our siding.
SO…to our local home improvement store we went to buy new shutters. I am very glad we did replace them actually because it wasn’t until we bought new ones that I realized the person who put the current shutters on the house had selected a size several inches too small. So, now we have pretty shutters, appropriately sized.
Let me tell you how we did it.
Thankfully, while more expensive than we anticipated, it wasn’t a hard project to tackle and very well may have saved us time over taking down, painting, drying, and reattaching the originals.
My wonderful hubby started by giving each plastic screw behind the existing shutters a snip. These screws attach the shutters to the house. He pulled out the shutters once they were “freed” and made sure to grab the remaining part of the screw yet in the siding. The next step was to fill the old holes with caulk and let it dry. The new shutters are covering up the old holes so you visually would not have seen them, but we didn’t want air, water, or bugs getting through the old holes behind the siding.
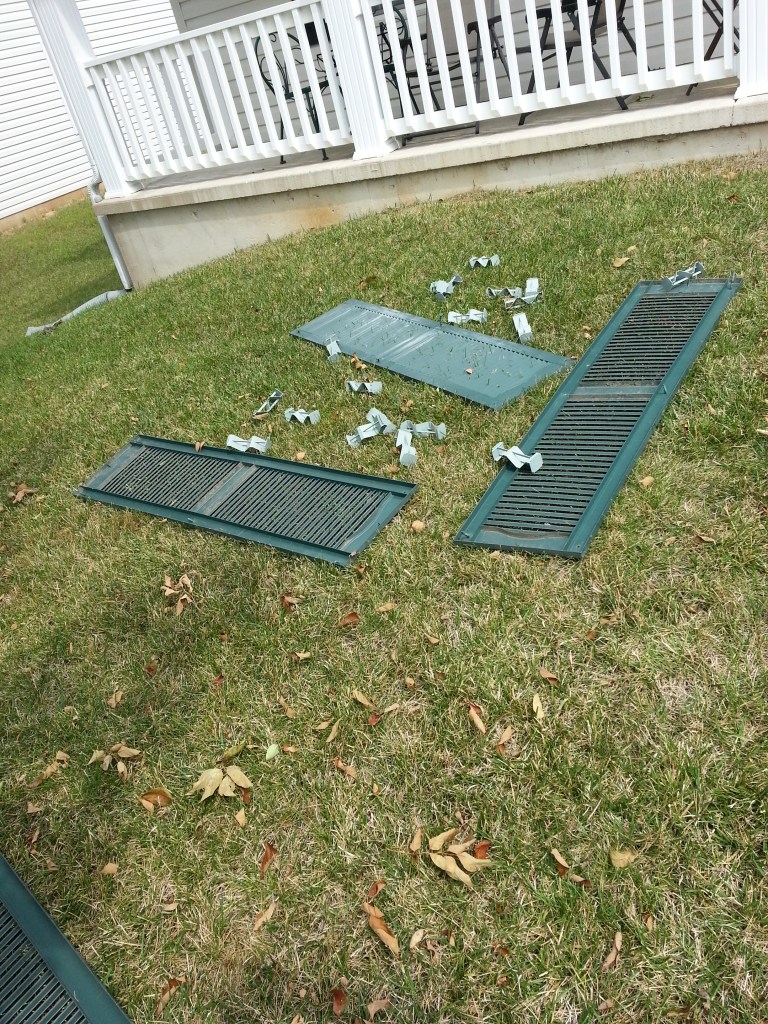
The discarded ugliness. You see now why I wanted to spend time on this, don’t you?
Then, once we decided where we wanted the new shutters positioned I held them up where they needed to be attached and my other half used the drill to screw in the new shutters using the provided screws in the packaging. And voila. So much better. It took one day for a neighbor to comment upon the improvement, so I think we’re on the way to turning around this home’s reputation.

Next I will tackle the front door, which also is a nice faded forest green color. Stay tuned.
