One of the first projects I completed by myself was the half bath update. There was a very unattractive, discolored vanity top that was pulling away from the walls, an over-sized plain sheet of mirror that somehow had gashes in it, a horrendous brass and fluted glass light fixture (with chunks of glass missing), more of those horrid curry yellow walls and scratched up honey yellow cabinets. All in all, it was a place I didn’t even want to use much less send my guests to.
I am still learning to take photos of our projects in a way that is illustrative. The image below demonstrates the countertop beauty we were dealing with. The actual faucet in the picture below is new. We had to replace that because the one that came with the house had the plastic globe knobs for hot and cold water and both were broken. Honestly, I don’t know what the previous owners did to this house! We probably should have been more afraid of it than we were come to think of it…

At the time I had become seriously bothered enough to take on this project I had only $200 to fix it.
Like any first time DIY-er, I started looking online for ideas. A few people had great results staining their cabinetry and just replacing the vanity top. Painting also seemed to work well but required a lot more prep. Stain seemed to be a viable option for keeping me in budget so I decided to try it.
To start I sanded both sides of the doors and wiped them clean of dust. We had purchased a nice mocha brown Winwax stain. There was a wax coating of some kind on the cabinets that impacted the results. The stain took unevenly.

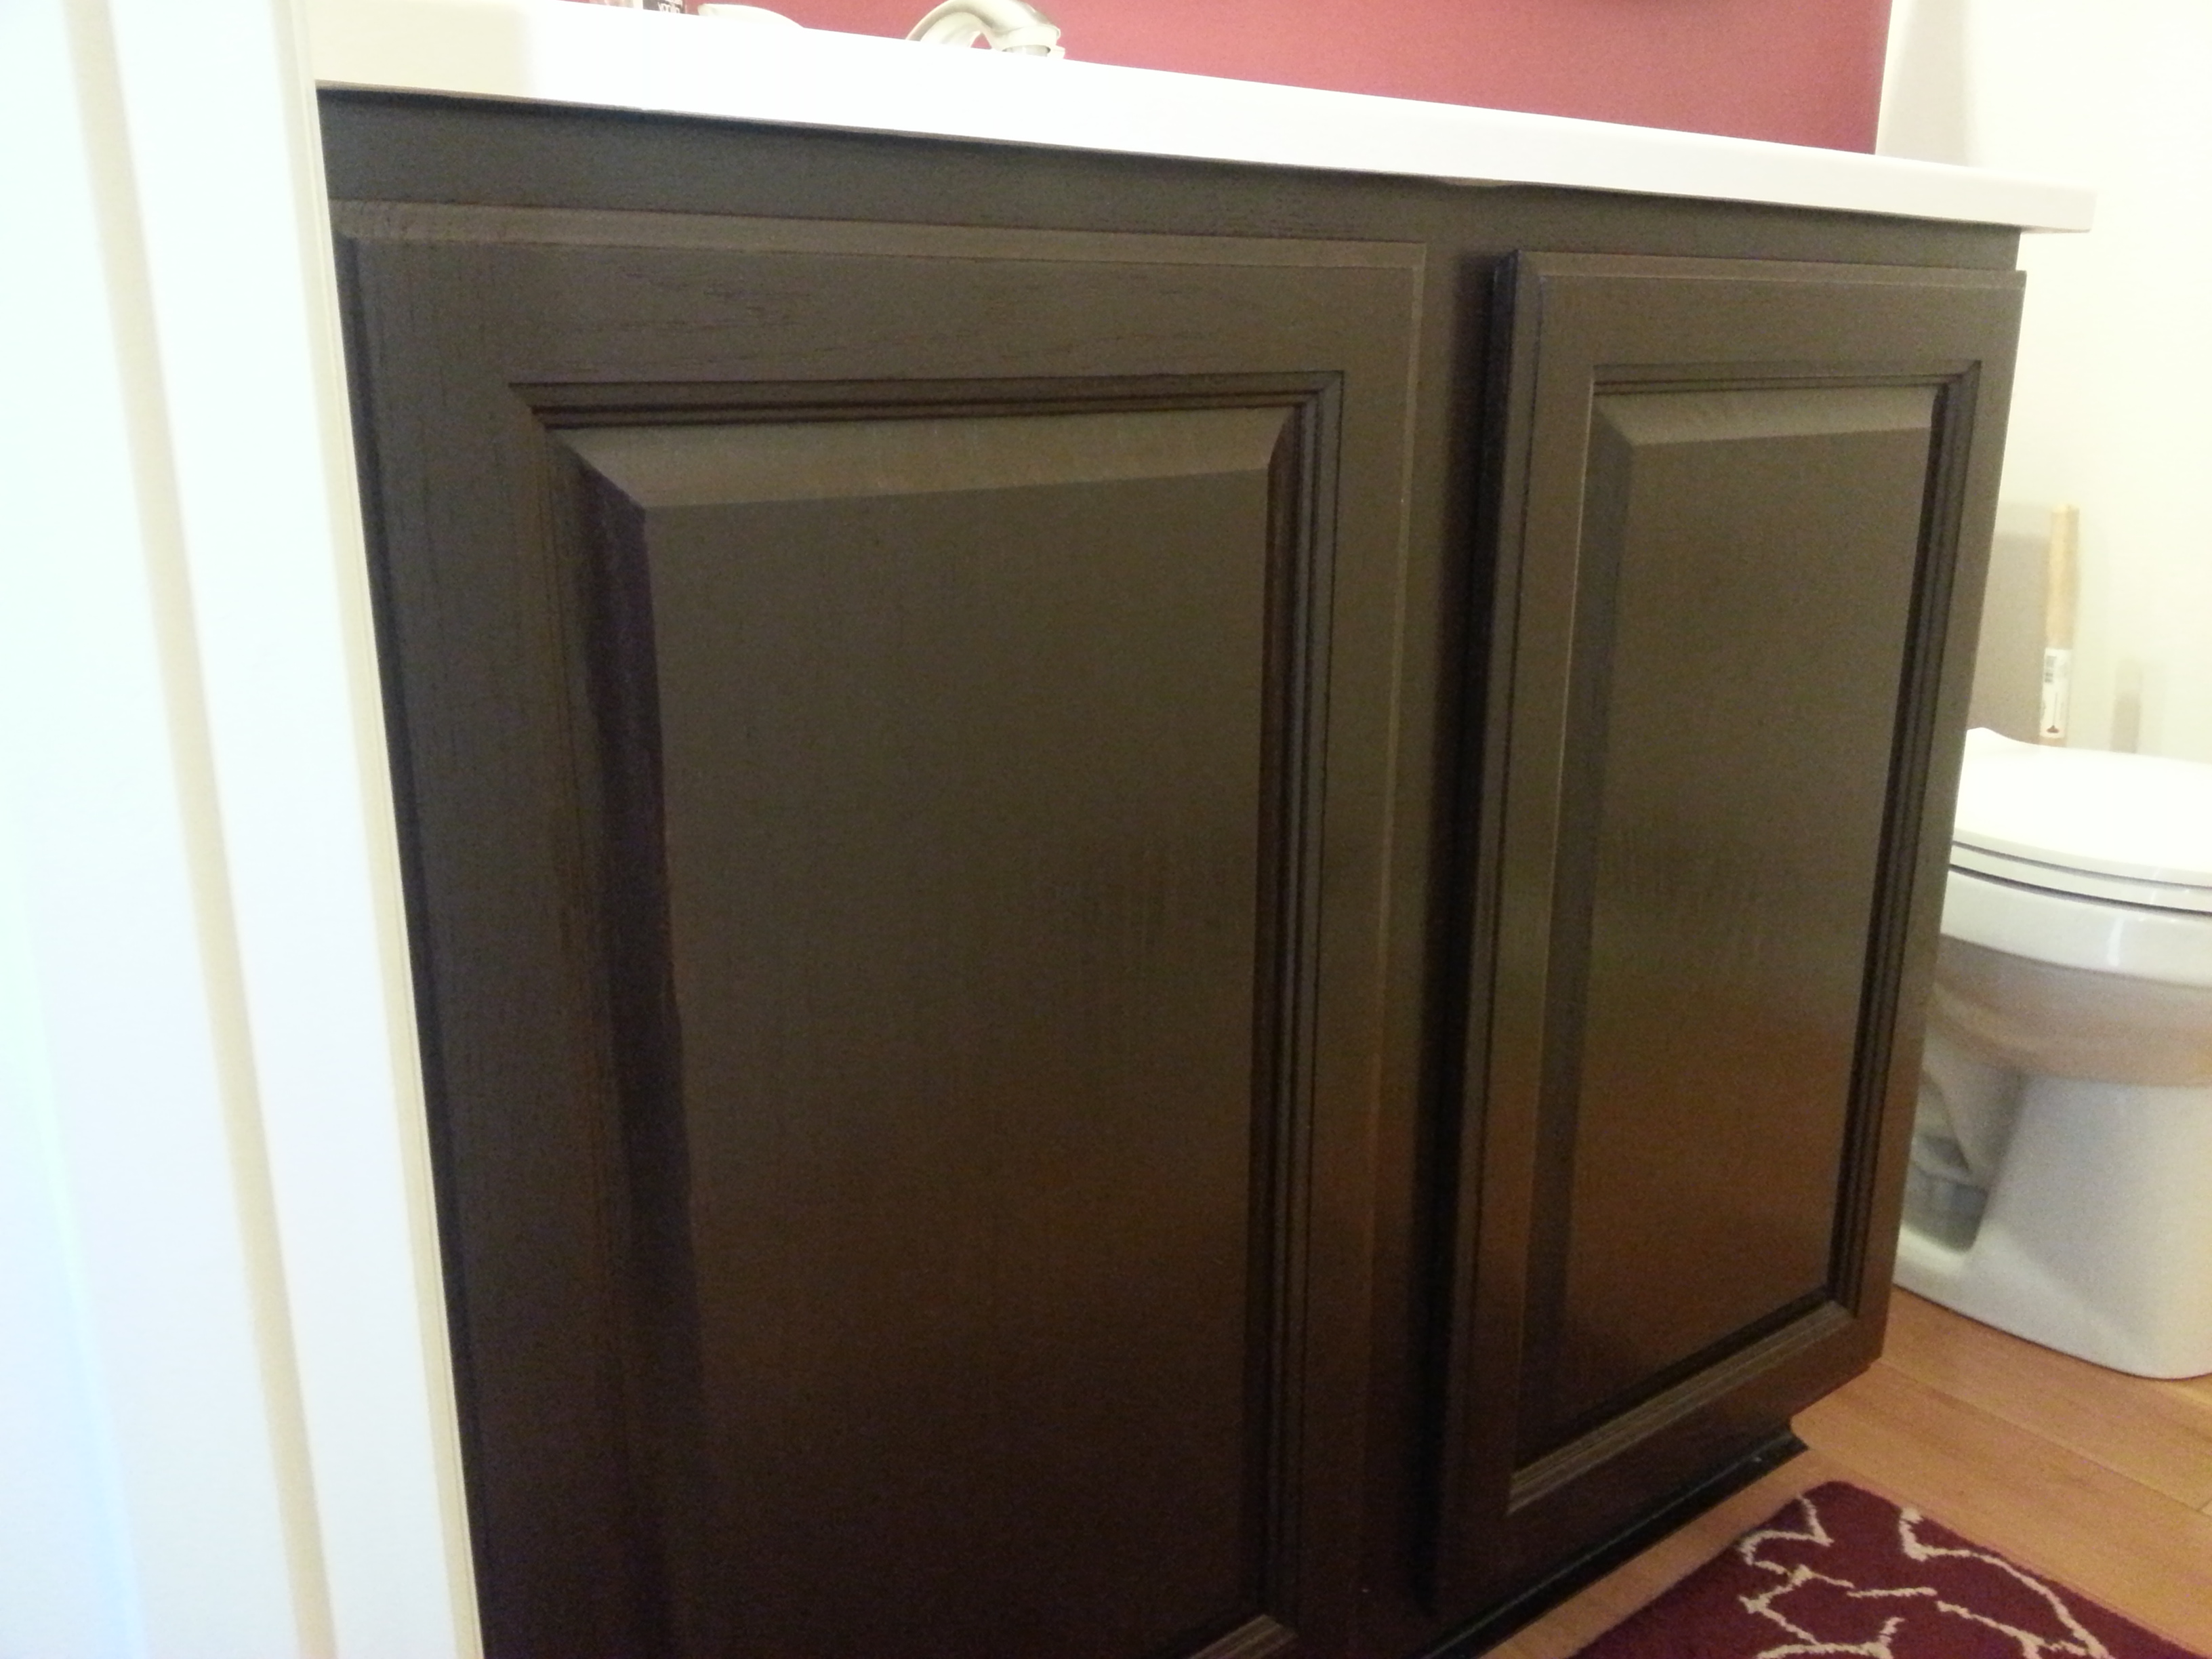
This picture does not do it justice. Most of the time people use that line to say something actually looks better in real life than it does in a picture, but here I really do mean that in real life the cabinet door looked worse than it does in this picture.
The uneven finish was not helped by a second coat so I hopped back online to find another option. This is where I was introduced to gel stain.
Using gel stain is much different than using regular stain or even paint because the texture, even after a good mixing, is more like loose pudding than liquid paint. “Painting” it feels more like smoothing out a shampoo over a wood surface, but I quickly found that a little goes a long way. Spread, spread, spread to achieve a thin coat. Repeat.
The other tip I acquired is to use an angled brush for greater control and a mini foam roller.
The nice thing about the gel stain is that it’s forgiving. I painted the front of the doors and the cabinet first, then the back of the doors and side of the cabinet in place. I thought they turned out pretty well all things considered.
To finish up the space, I found a white vanity top with integrated sink at Menards on sale, and at Lowe’s found a light fixture in a brushed nickel look that matched the updates we were making around the rest of the house.
The last piece was a large framed mirror that matched the color of the gel stain on the cabinets. Purchasing a mirror that was the size I needed to fill the wall space put me $50 over budget, but in the end it was worth it to get a mirror that was the right size for the space.
In what probably should have been my first step in this bathroom, once I saw the cabinet come together I pulled out some leftover dark cherry red paint I had from our old house and used it to create an accent wall.
Here is a glimpse of what the powder room looks like now:
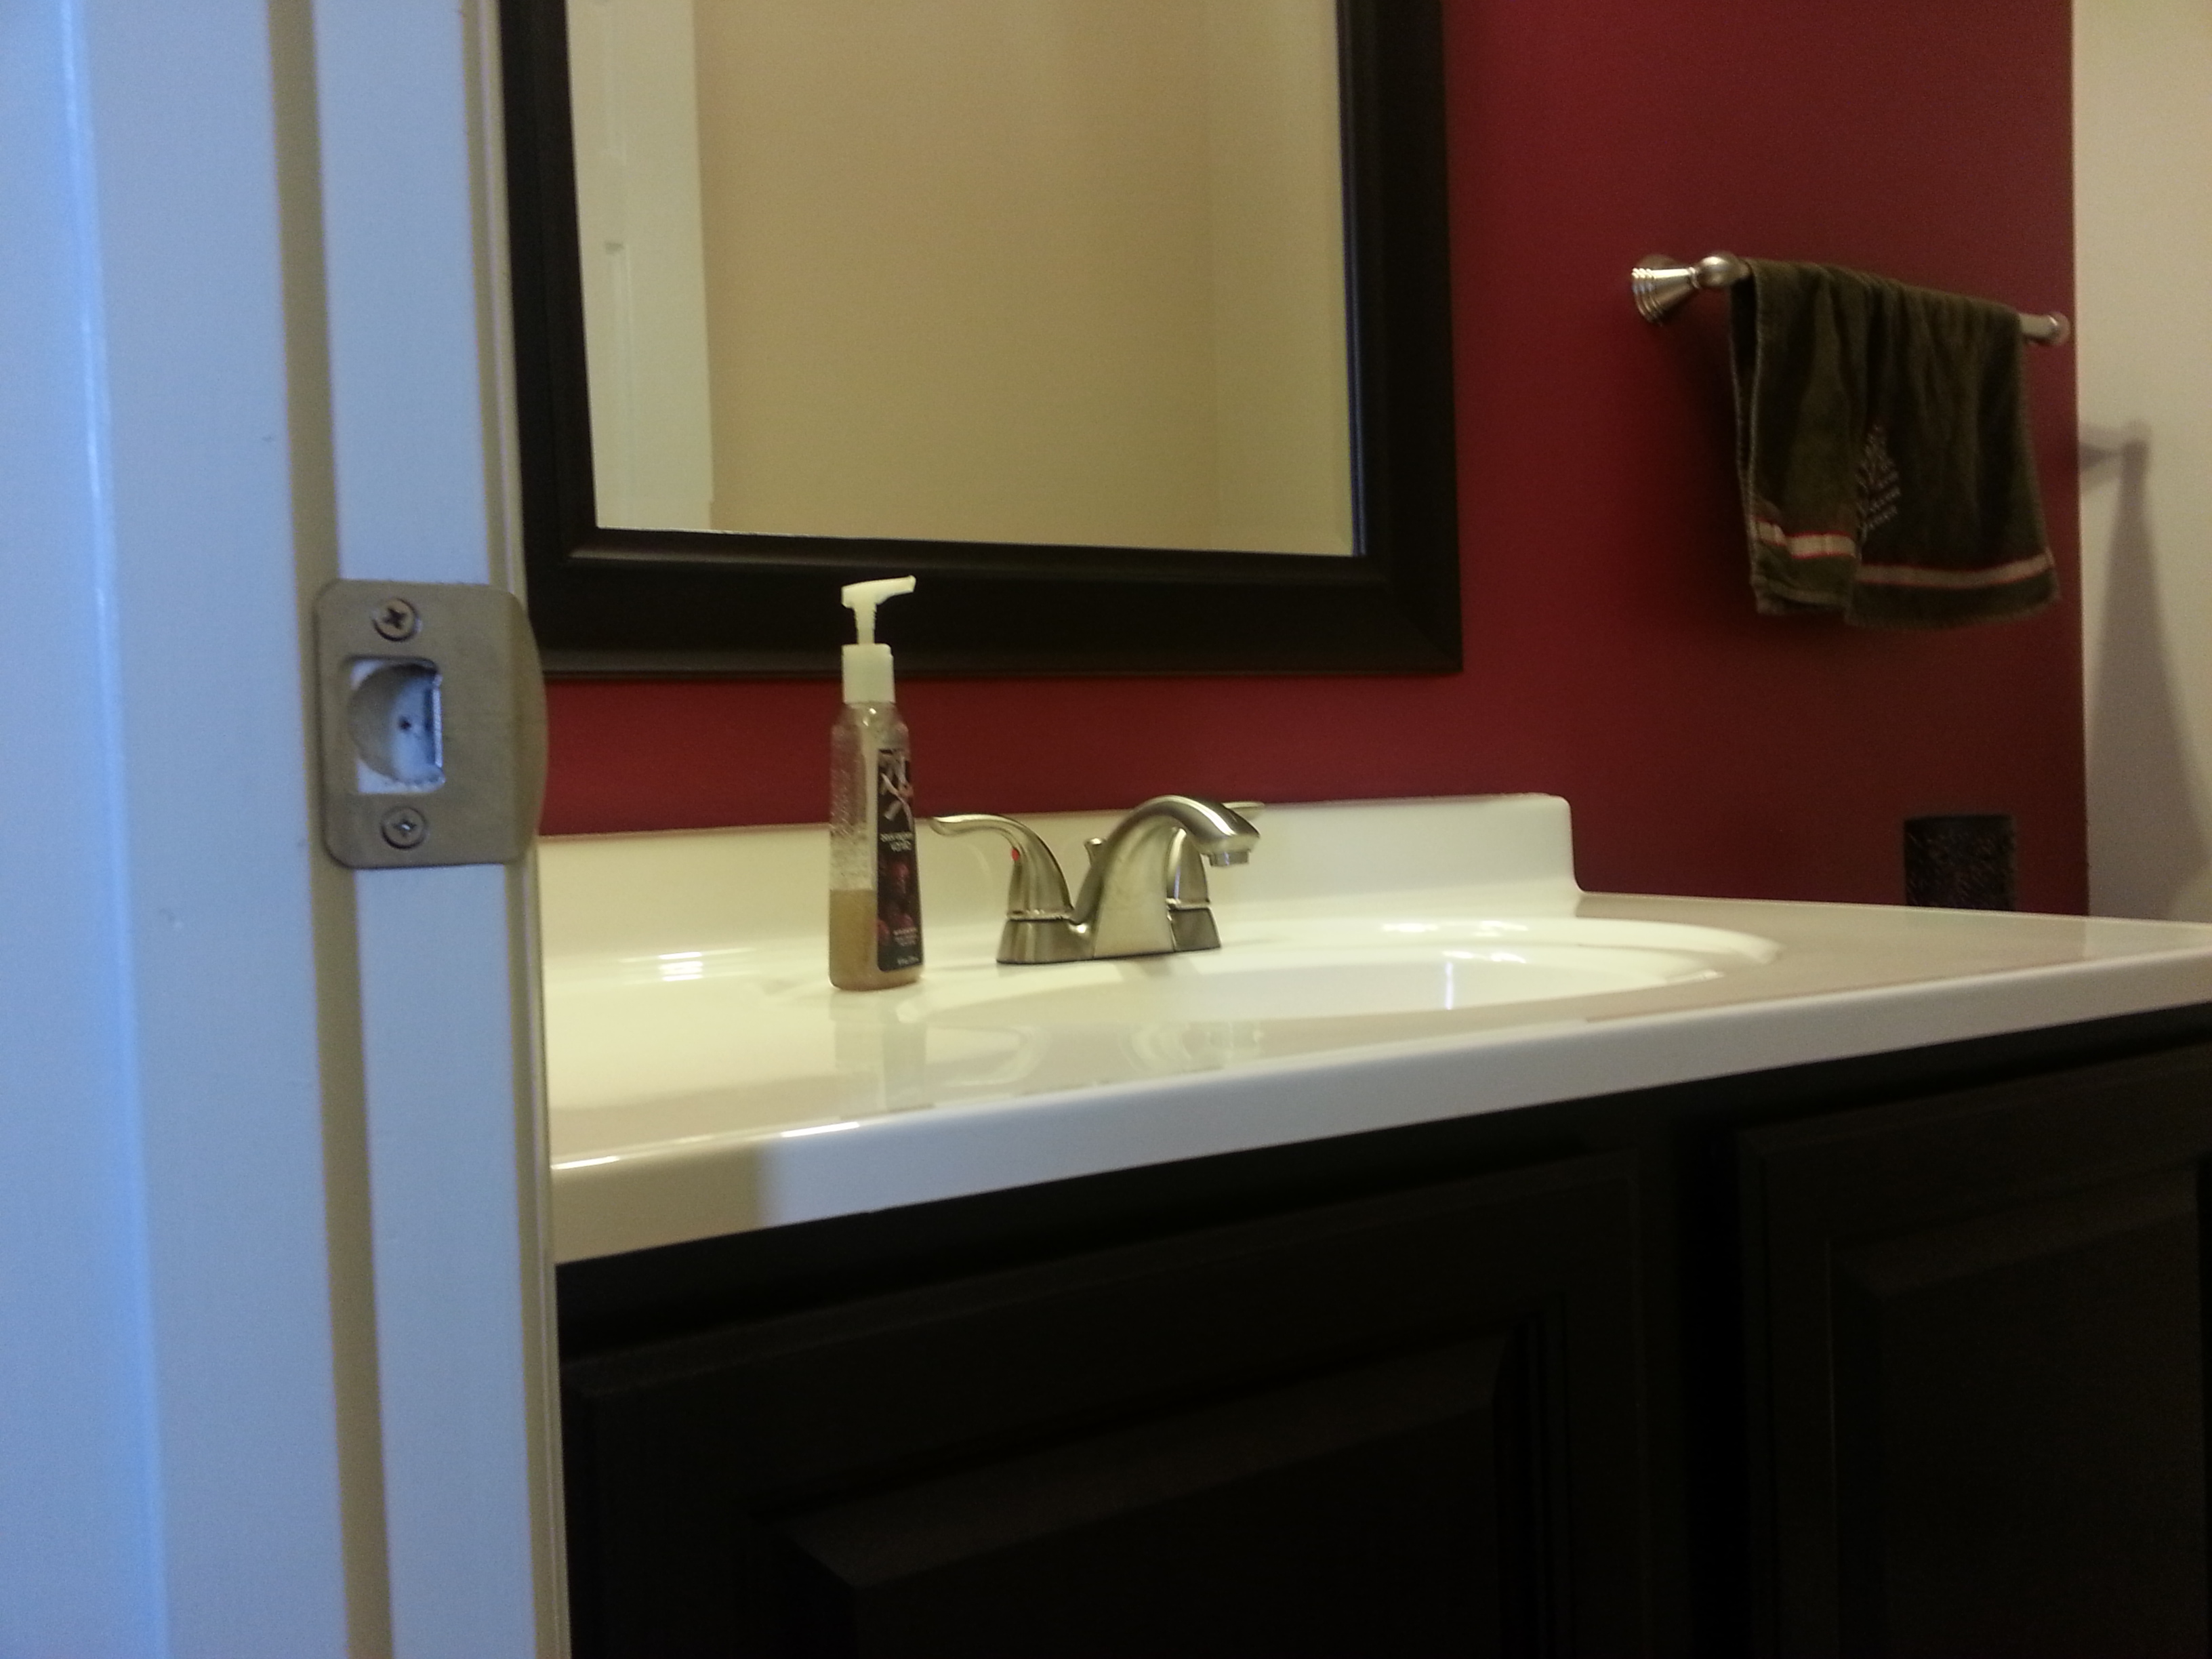
No more discolored, separating counter top or honey yellow vibe. I could do a happy dance. I may have.
The materials I used were low-end and the gel stain, upon close inspection, does not look as nice as new cabinets would. However, no one but my own mother will probably inspect these while whipping in for a quick restroom break so I think they’ll work for awhile. It is still a vast improvement over what was before and now I don’t feel embarrassed to let people use the half bath when they come over.
More projects in this fixer-upper left to do. The fun never ends around here!
