As I’ve mentioned before, when we selected this house we knew it was going to be work. But I have to tell you, with both of us working full-time, the presence of a (super cute but super active) kiddo, and needing downtime like normal people, it takes awhile for our projects to get finished – even if we have the itch to do them. Enter our latest project: the pink bathroom.
Now this bathroom was probably cute at first – for a little girl or an older lady. But I question if it was a good choice at all, ever, given the time period of when this house was built. Our house was built in the 90s and I’m not sure the color selections were advisable then. It really isn’t a fit for our style or the fact that this bathroom is primarily used for our little man.
Here is a pic of it in it’s former glory:
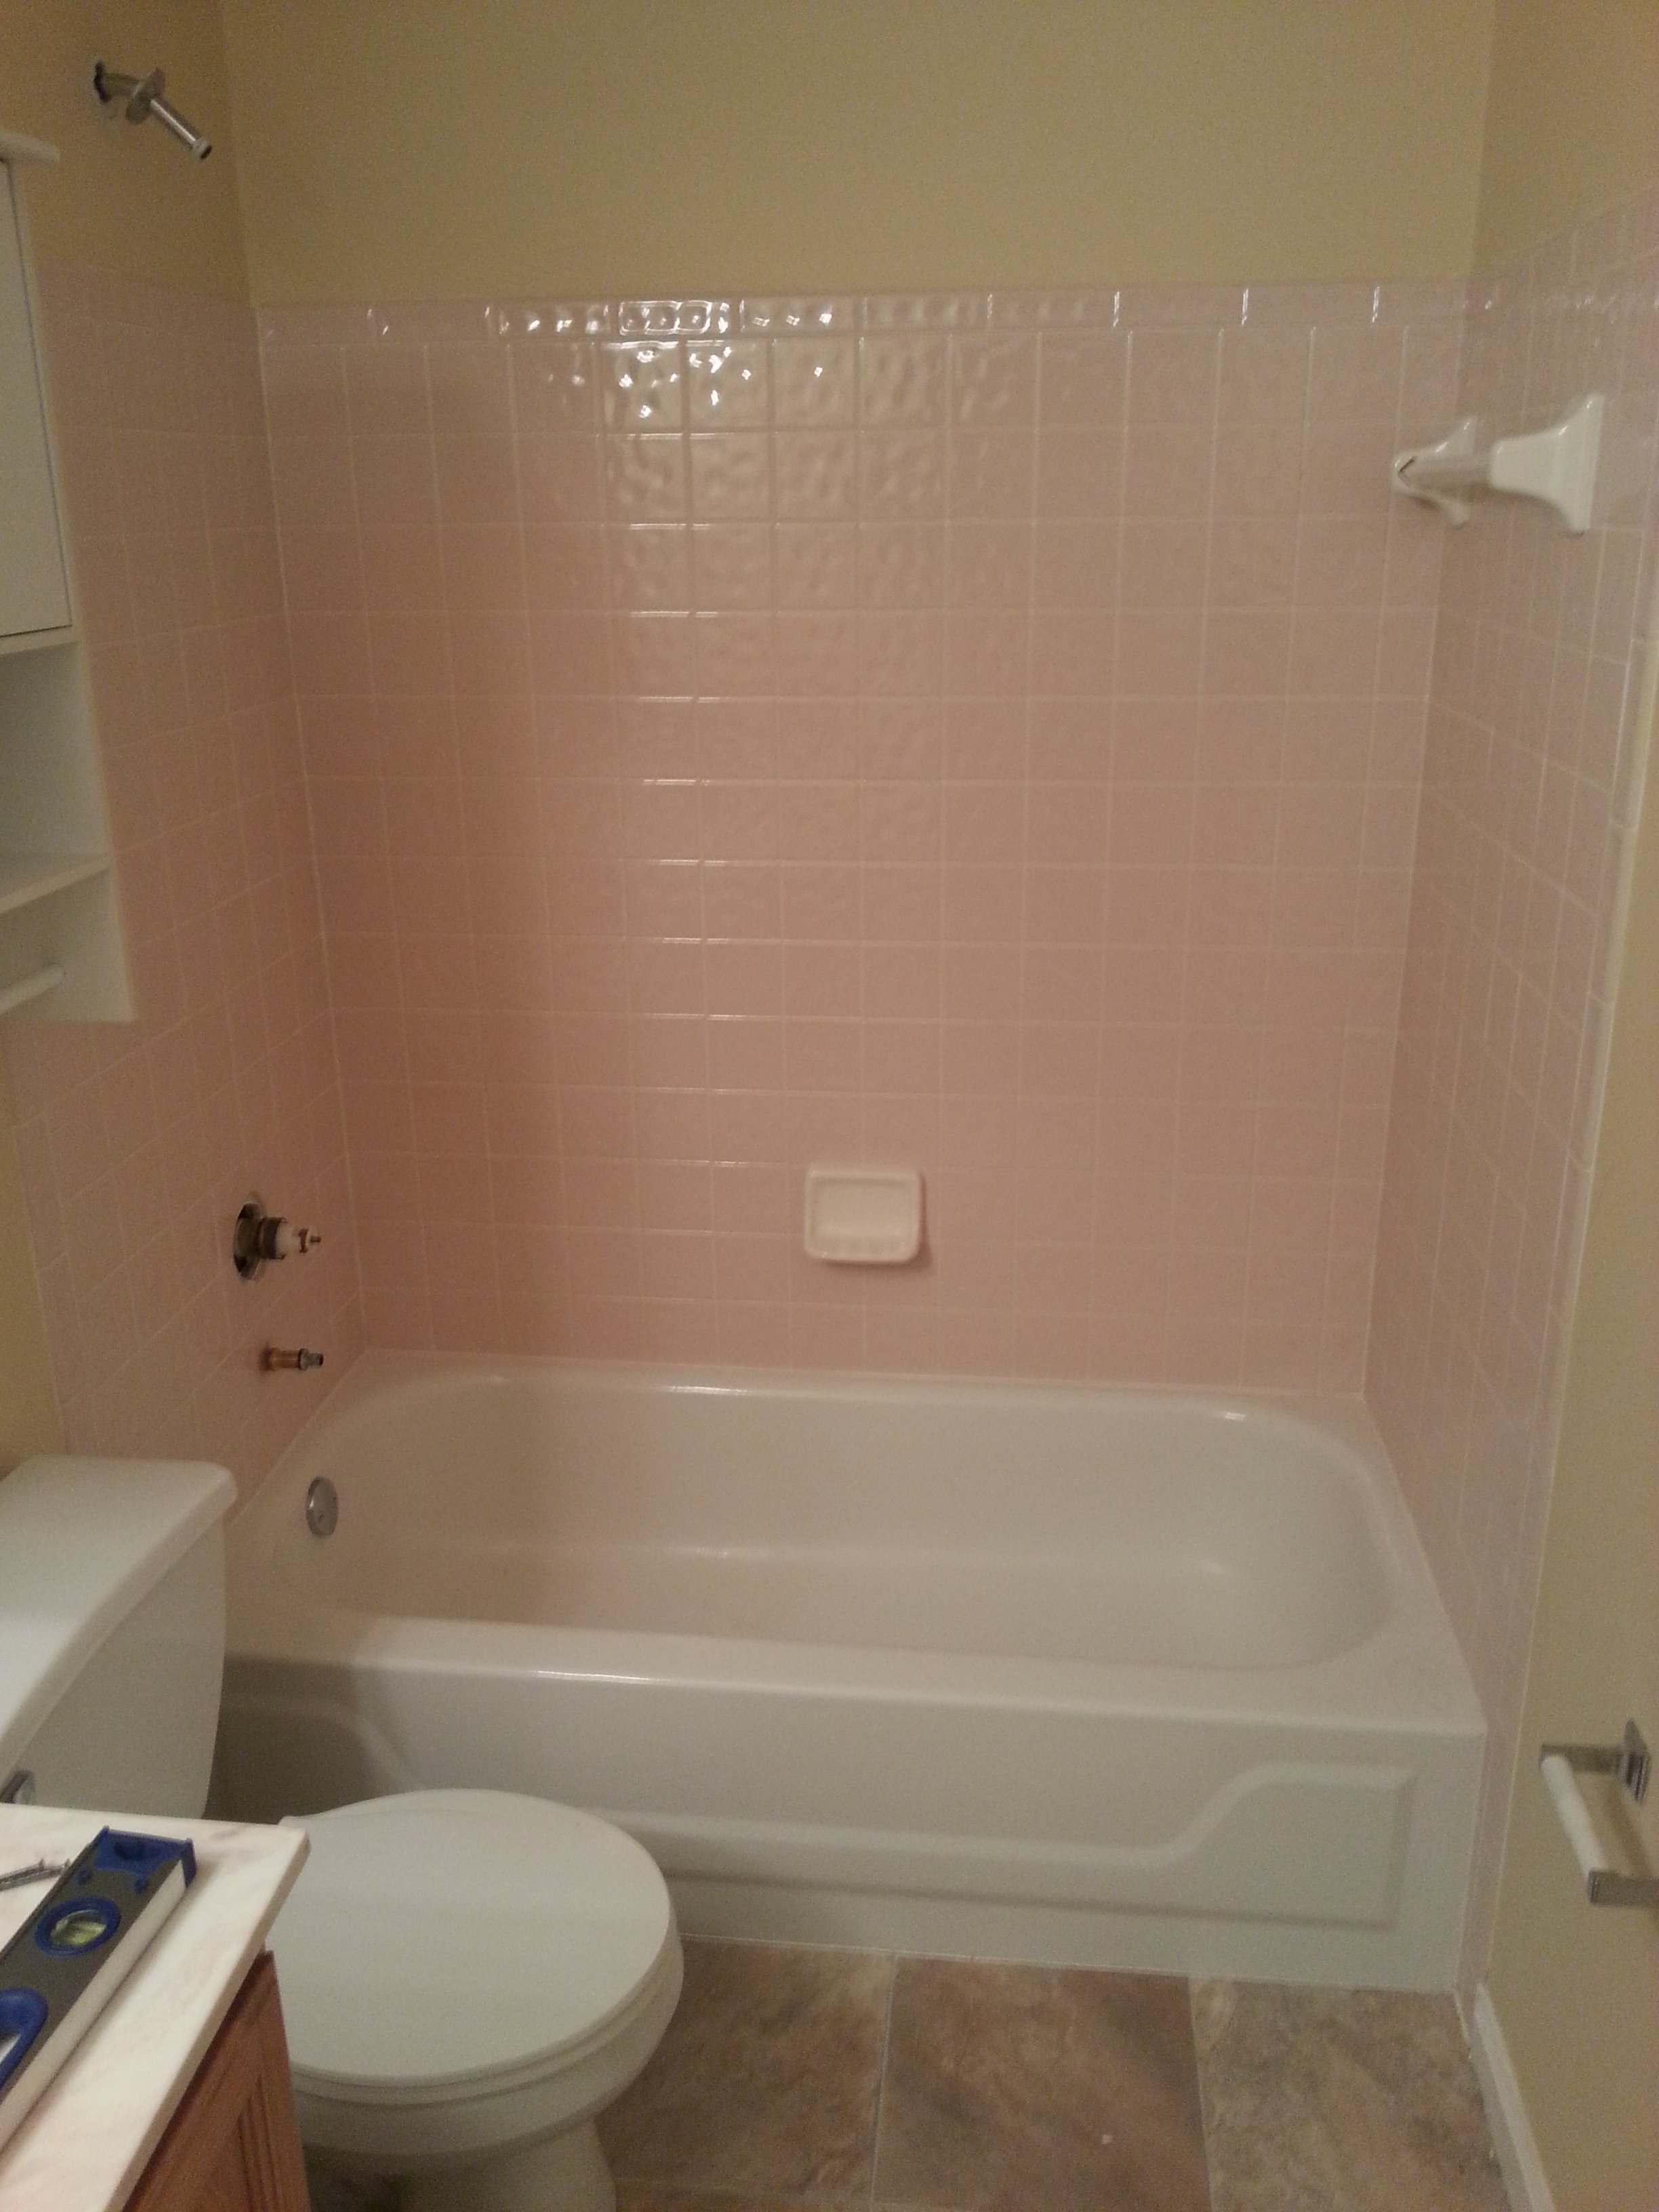
Oh yeah.
You can’t tell from this picture but the flooring was a pinkish-bluish-cream swirl pattern and the vanity was pink and white swirled marble. It was pretty spectacular.
It didn’t take long for us to get it into our minds that we were going to totally redo this room from top to bottom. We had absolutely no experience with this type of project. But, after a ton of research, we put a plan together and my super handy hubby started demoing while I shopped. (It’s a great arrangement.) Once we had all of our materials assembled in our garage we got to work.
On day 1 the pink shower tile was ripped off and the bluish-pinkish vinyl flooring was torn out. It actually takes quite awhile to do this and it’s messy. Because the tile was stuck on to the walls pretty tightly, removing them removed portions of the wall behind it. We were prepared for what to do in this instance because of our previous kitchen backsplash removal effort. We ended up handling it the same way: by removing entire drywall portions and replacing them.

In this picture you can see it at the stage where we had taken down the tile and drywall and were putting up a moisture barrier.
You actually have quite a few choices when it comes to replacement materials in a bathroom. At first I couldn’t decide if I just wanted tile on the floor and a fiberglass shower surround as you see in many houses these days, or if we were going to use tile for both floor and shower walls. I was swayed when I found out that a shower surround is not cheaper than using tile. Also, our tub is an older model and in researching shower surrounds I couldn’t find one that matched the tub enough to make it look original. And I’m a sucker for things that match. Finally, we learned when house hunting ourselves that tile in our area is worth more for resale. The catch is: using it is not less work.
I found a fairly inexpensive porcelain tile of pretty quality that also had good reviews on sale at HD. For materials we needed backer board, a tile cutting tool, spacers, grout and color-matching caulk in addition to the tile itself.
If you think you want to take on a project like this, do your research. We learned a lot from reading articles by home improvement project experts and watching videos. When tiling a shower surround you start at the bottom center, cutting or shaving off the bottom of the tiles as needed to create a level line to build upon as you move up the shower walls. You also want to start in center and work your way out, so your corner pieces are as symmetrical as possible.
It took several weekends of work but “we” (really, my awesome husband) finally finished tiling the shower surround. The picture turned our terribly. The tile is not at all pink, but different shades of taupe and cream. Remember in my very. first. post. when I said I am not a camera expert? Here’s living proof.
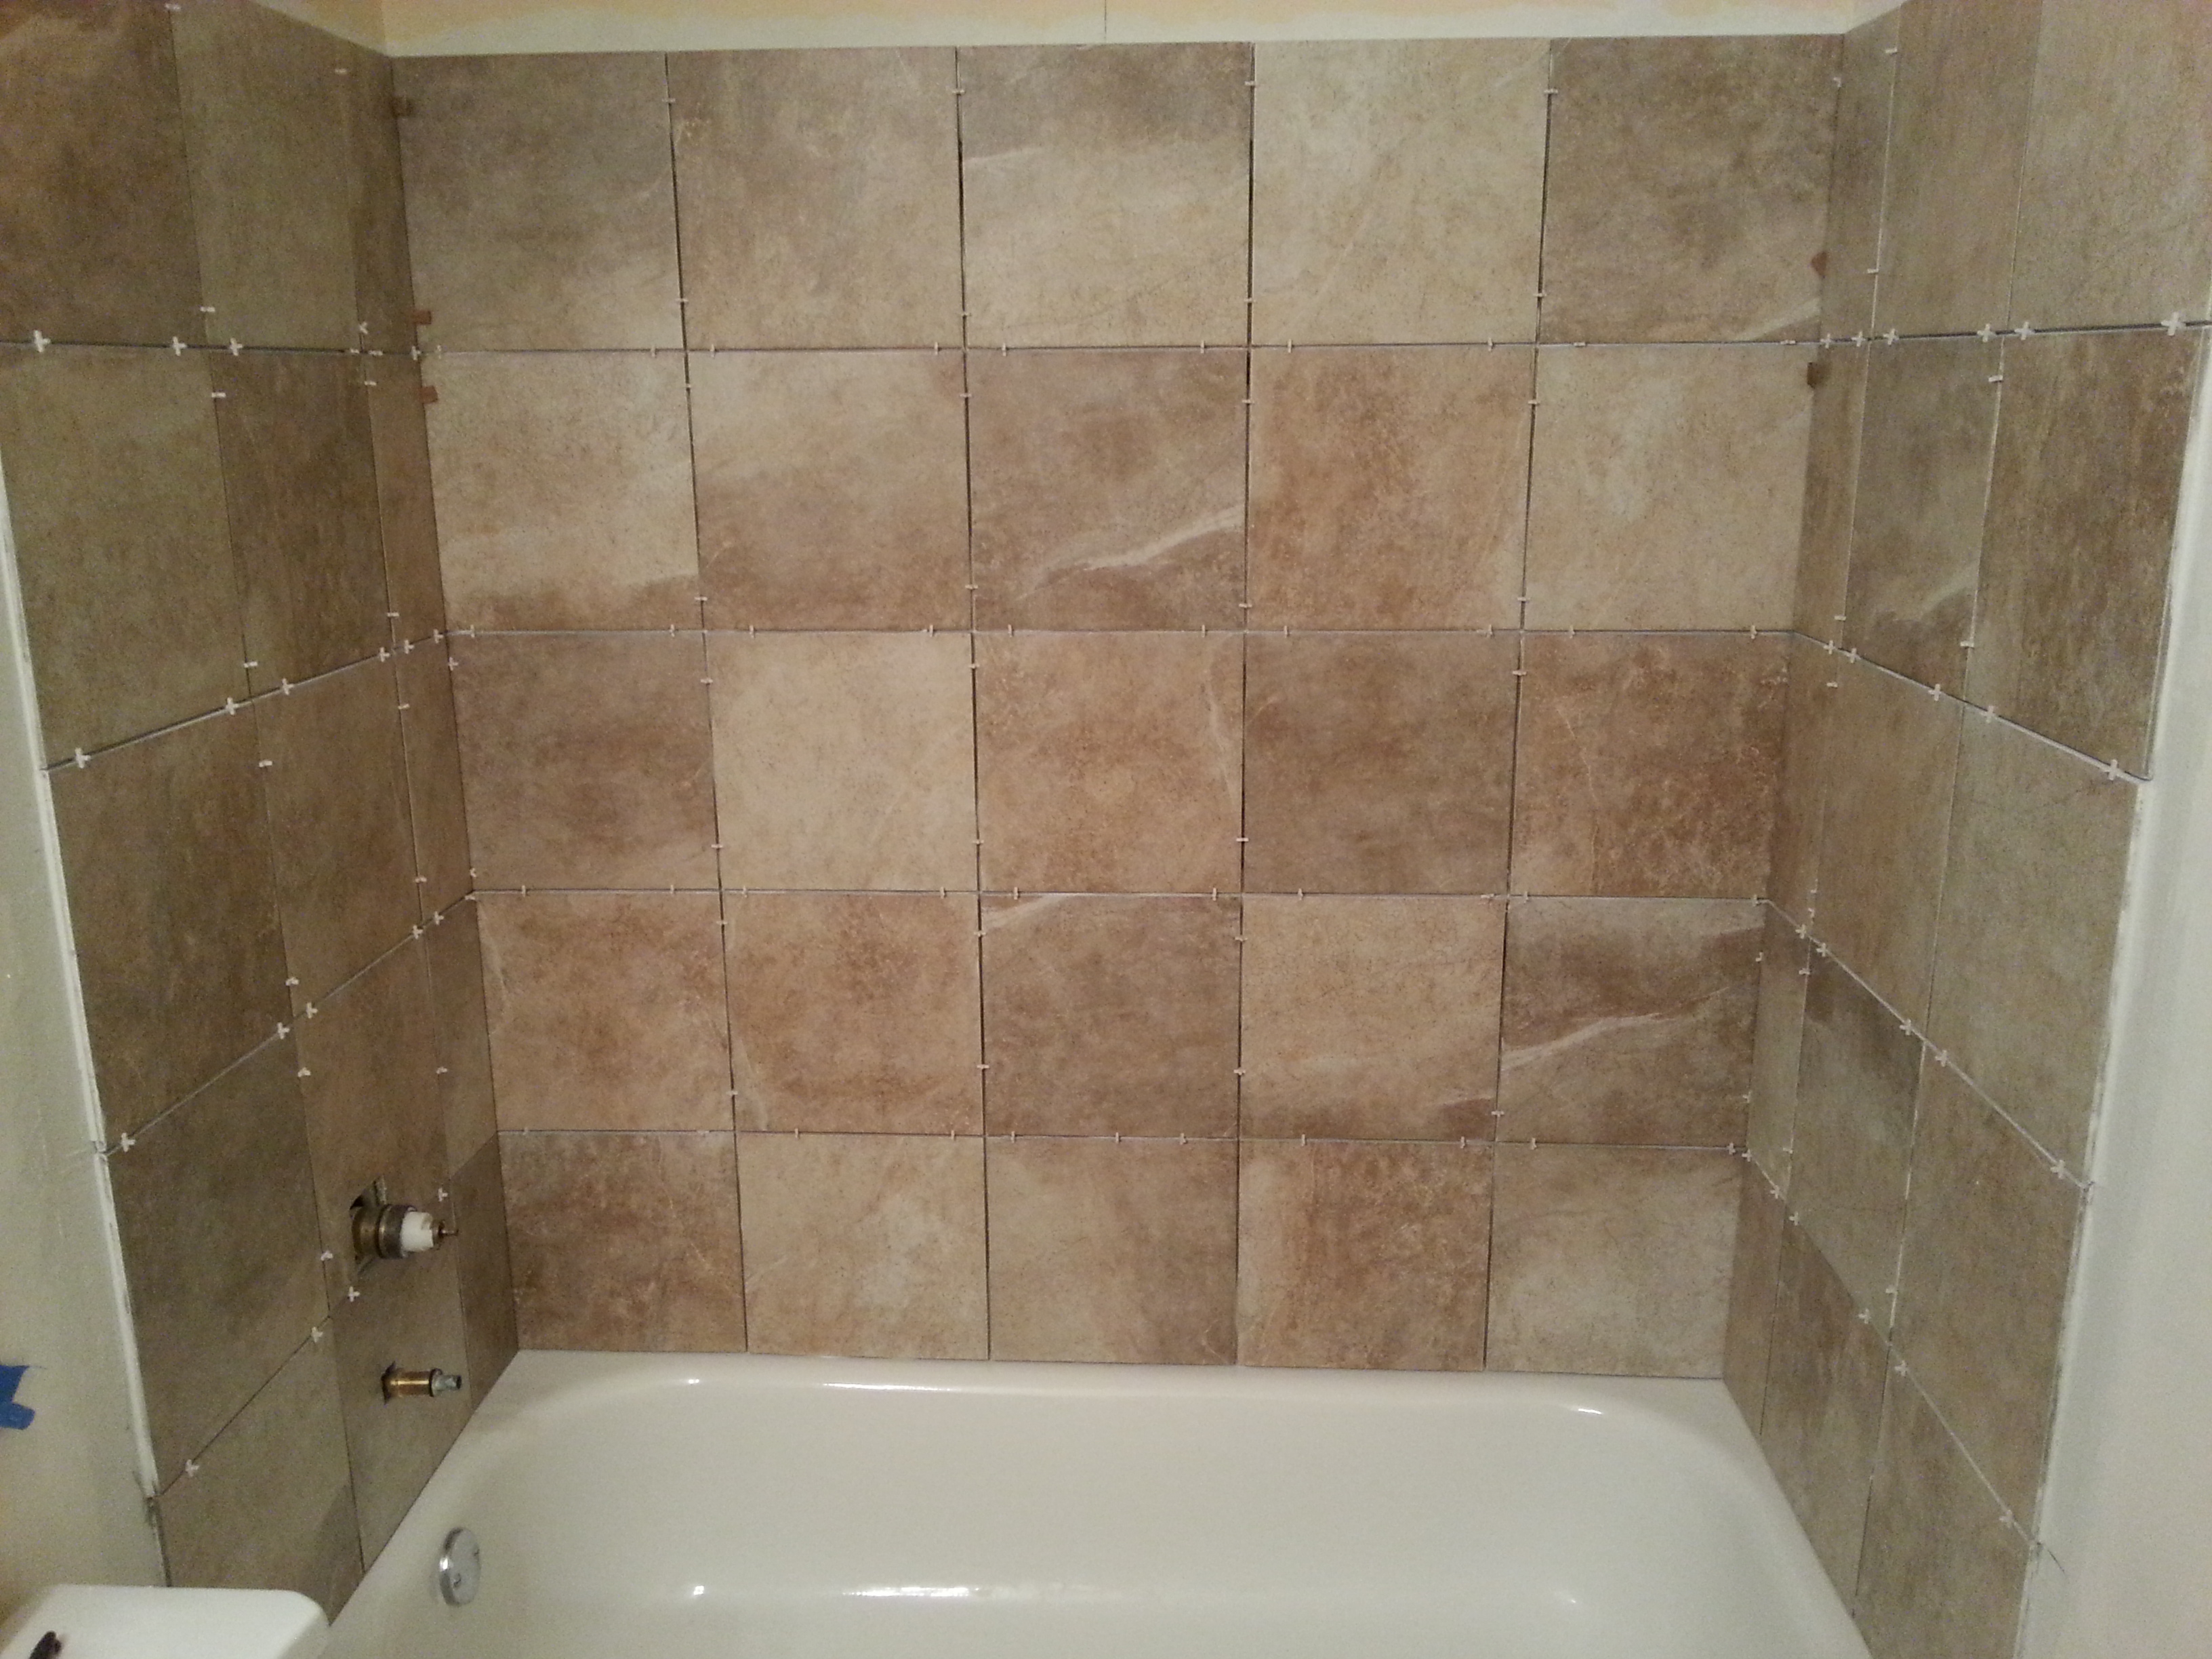
It still needs to be finished out with grout and caulk but stay tuned for an update on how it and the rest of the bathroom comes together!
